In this guide I’ll show you how to fully set up Discord user verification. This is used to fight spam and bots in your server. It ensures all users are human by using a validation method called Captcha.
Create a new Welcome channel #

Type in the channel name “welcome” and click the Create Channel button:

After creating the welcome channel you can right click it and use the invite option to use it to send invites to new users. This way they will land in the Welcome channel by default.
Add a Verified role to your Discord server #

Next up edit the verified role and go to permissions. Ensure that at least the “View Channels” and “Send Messages” settings are enabled. It’s probably fine as it is default.
Restrict Default user permissions #
Go to Server Settings, Roles and click the Default permissions:

Next up, turn off all permissions. Only a user with the Verified role should be able to see the other channels.
Restrict Verified users seeing the Welcome channel #
Right click the Welcome channel, click Edit Channel, go to Permissions and add the Verified role to the channel and deny that role the “View Channel” permission:

Set up the Welcome message from the Bot #
In the CryptoBot Dashboard go to Modules and click the “Welcome” Module.

Enable the Verification option and set the Verification role #
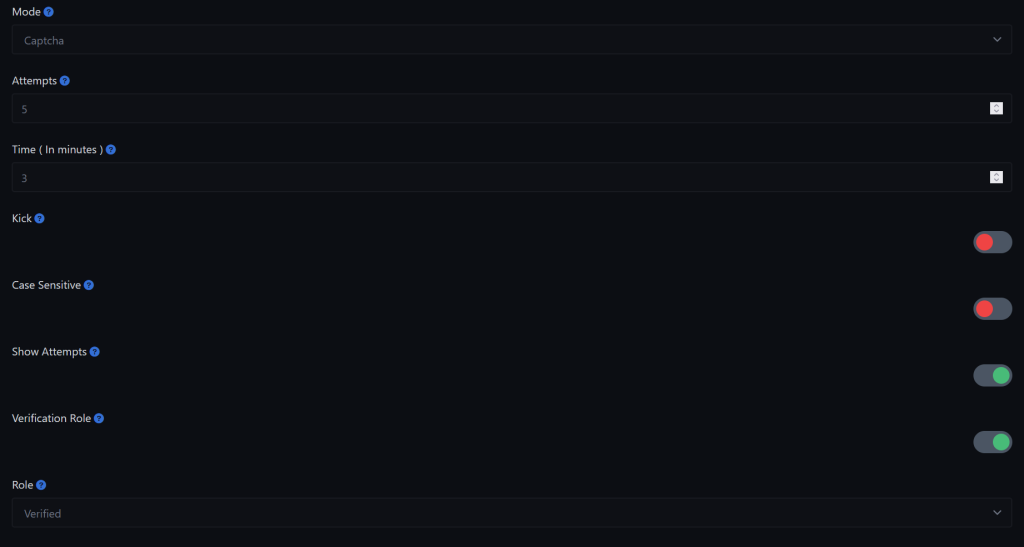
In the CryptoBot Dashboard go to Modules and click the “Verification” Module. Set it up the way you would like it to be. If you set up the kick module people will automatically get kicked if they don’t verify in the time you specify.

After this you’re done setting up the verification bot. If a new person joins he or she should be dropped in the Welcome channel. As soon as this user verifies their account they will be able to access all the other server channels.


